

Battery Replacement Instructions for Ademco Lynx and ADT QuickConnect Panels
Compatible with:
Ademco Lynx
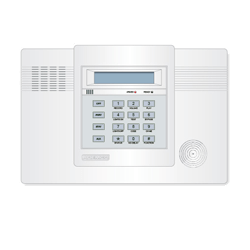
ADT QuickConnect

Instructions
What You'll Need
- A registered MyADT Account
- 1 small Phillips head screwdriver
- 7.2V, 3700mAh battery

You can purchase a 7.2 Volt 3700 mAh battery from MyADT or from retailers such as Walmart, Amazon, Batteries Plus, Home Depot, and Lowe’s. We also recommend checking with your local retailers for availability. Here are the specifications of the 7.2 Volt 3700 mAh battery:
- Voltage: 7.2 V
- Capacity: 3700 mAh
- Terminals: Connector
- Chemistry: NiMH
- Length: 4”
- Width: 2.7”
- Height: 0.07”
- Weight: 0.30 lbs.
NOTE:
The battery pack is located inside the keypad. The battery pack has black and red wires coming out of it with a modular connector at the end.
CAUTION:
Do not remove the green plastic cover from around the new battery pack. This is covering is necessary for a proper connection and may cause serious injury or damage if removed or damaged.
Step 1:
Set your system to Test Mode. Log into your MyADT account, click on the Alarm System tab, and select System Test.
Step 2:
Unplug the control panel’s transformer from the outlet. You may need the screwdriver to remove the retaining screw on the transformer.
Step 3:
Find the two tabs on top of your keypad, press them in to release the cover and gently pull the keypad toward you.

Step 4:
Quickly inspect the old battery. If the battery looks abnormal (i.e. has a swollen or split case, liquid leaking from the case, or corroded terminals) close the keypad and call (800) ADT-ASAP to schedule a service call.
Step 5:
Remove the small screw from the plastic battery bracket. Be sure to put the screw in a place where you won’t lose it since you’ll need it later.

Step 6:
Gently remove the wires from their retaining clips, and then disconnect the battery wires by pulling on the plastic connector.

Then tip the top of the battery up to remove it from the compartment.

Step 7:
Remove the new battery from its packaging.
CAUTION:
Do not remove the green plastic cover from around the new battery pack. This covering is necessary for a proper connection and may cause serious injury or damage if removed or damaged.
Step 8:
Place the new battery in the compartment and then screw in place the plastic battery bracket.
Step 9:
Thread the wires under the retaining clips, remove the protective plastic from the connector, and plug it into the receptacle.
Step 10:
Replace the keypad, the two tabs snap back into place, and then plug the transformer back into the outlet.
Step 11:
Check your alarm keypad to ensure it no longer displays the “BAT” or “SYSTEM LO BATTERY” message. If it still shows a low battery message, try entering your code and pressing the OFF button. Repeat if necessary. If the message still shows, it may take 24 to 48-hours for the battery to fully charge. If after 48-hours the message still shows, please go to MyADT.com and start a Chat Session with us, or call (800) ADT-ASAP to troubleshoot your system.
When the message is gone or you’re waiting for the battery to charge, remove your system from Test Mode at MyADT.com.
Ensure your system is working properly by testing your system. Go to MyADT.com and place your system on test and then follow the directions in the user guide to test your system or visit MyADT.com to find your user guide