

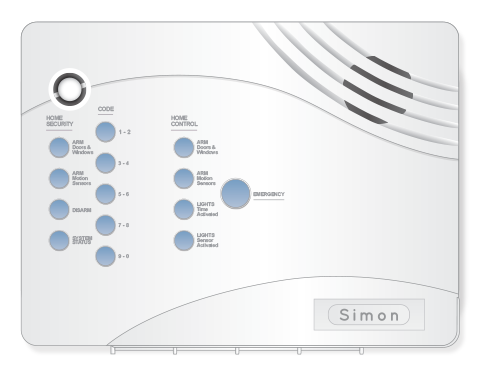
Battery Replacement Instructions for Simon 1 and Simon 2 Panels
Instructions
What You'll Need
- A registered MyADT Account
- 1 small Phillips head screwdriver
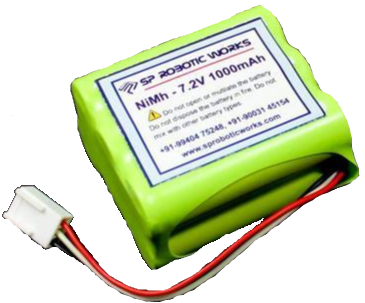
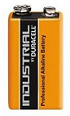
- 7.2V 1000mAh battery pack or a 9V 1.2Ah Lithium battery
- Small pliers with electrically insulated handles
You can purchase a battery from MyADT or from retailers such as Walmart, Amazon, Batteries Plus, Home Depot, and Lowe’s. We also recommend checking with your local retailers for availability. Here are the specifications of each battery:
7.2V 1000mAH battery pack
|
9V 1.2Ah Lithium battery
|
NOTE:
Always replace the battery with the same type as the old battery. Do not switch battery types.
Step 1:
Set your system to Test Mode. Log into your MyADT.com account, click on the Alarm System tab, and select System Test.
Step 2:
Locate and unplug the transformer. The transformer is typically a 3" square block-style plug that is either beige, white, or black in color and it is also typically screwed into the outlet.
![]()
Step 3:
Open the panel by pushing on the tab at the top of the unit and lifting the face of the panel down. The battery will be in a compartment on the lower right.
Step 4:
Quickly inspect the old battery. If the battery looks abnormal (i.e. has a swollen or split case, liquid leaking from the case, or corroded terminals) close the keypad and call (800) ADT-ASAP to schedule a service call.
Step 5:
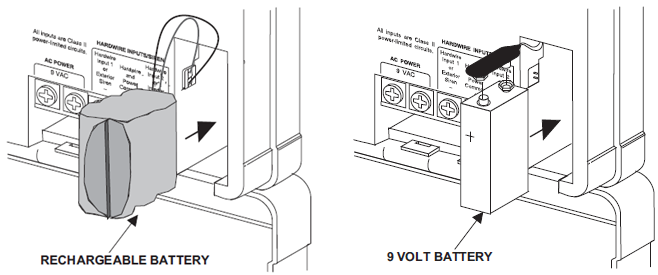
Release the battery by pushing up on the top tab and pushing down on the bottom tab.
Step 6:
Remove the old battery. If replacing a 7.2V battery pack, lift the battery out of the compartment and then unplug the connector wire from the port on the left side of the compartment. If replacing a 9V battery, life the battery out of the compartment and then remove the battery connector strap from the top of the battery.
Step 7:
Plug the transformer into a 24-hour, 110VAC non-switched outlet. Screw it into the outlet, if needed.
Step 8:
The Control Panel will initially indicate a low battery by lighting the SYSTEM STATUS button. If this button is pressed, the Control Panel will announce "System low battery." The 7.2V Rechargeable battery may take up to 9 hours to fully charge. The Control Panel does a battery test every 4 hours and will clear the status message when the battery is good and/or fully charged. If after 48-hours the message still shows, please call (800) ADT-ASAP to troubleshoot your system
When the message is gone or you’re waiting for the battery to charge, remove your system from Test Mode at MyADT.com.
Ensure your system is working properly by testing your system. Go to MyADT.com and place your system on test and then follow the directions in the user guide to test your system or visit MyADT.com to find your user guide.