

Ademco 20P - System Manual
System Overview
The Ademco Vista 20P represents the latest in home and business security protection technology providing ADT customers with:
- Burglary, emergency, and fire* protection
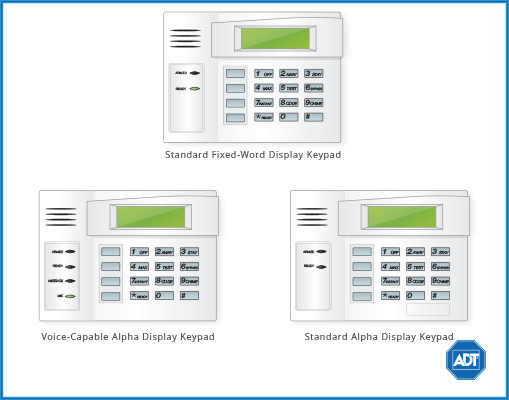
- At least one touchpad to control operations and display system status
- Sensors for perimeter and interior burglary protection
- Smoke or combustion detectors* for early fire warning
- Display of zones triggered during alarm
- System scheduling
The Vista 20P is designed to be as maintenance free as possible, however we suggest that you still test your system once a month and after any alarm occurrences.
Treat the system as you would any other electrical equipment. Do not slam protected doors or windows, keep dust from accumulating on the touchpad and sensors and do not spray water or any liquid on the units.
* Your system may or may not support fire protection.
System Keywords
| Keyword | Meaning |
| Alarm | Appears when an intrusion has been detected and the system is armed (also appears during a fire alarm or audible emergency alarm). Accompanied by the protection zone in alarm. |
| Away | All burglary zones, interior and perimeter, are armed. |
| Instant | Entry delay is turned off. |
| Stay | Perimeter burglary zones, such as protected windows and doors, are armed. |
| Fire | Appears when a fire alarm or fire fault is present. Accompanied by a display of the zone in alarm. |
| Bat | Low battery condition in a wireless sensor if zone number is displayed or low system battery if no zone number is displayed. |
| Chime | Appears when the Chime feature is activated. |
| Bypass | Arming the system with protected areas intentionally left open. |
| Check | A malfunction has occurred. See area zone number to identify location of trouble event. |
| No AC | AC power has been cut off and the system is running on backup battery. |
| Not Ready | System not ready for arming. READY indicates the system is ready. |
Arm & Disarm the System
Arming
When arming your system it is important to note that:
- Before arming your system, all protected areas must be closed. Use the [READY]/[*] key to display any faulted (i.e., open) zones. The system will display READY when the system is ready to be armed.
- Codes and commands must be within of 10 seconds of each other. If more than 10 seconds elapse between entries, the entry will be aborted and must be re-entered.
- If you make a mistake while entering your security code, first stop and then press [*][*] to start over.
There are five possible modes for arming your system:
- Instant Mode arms the entire perimeter when no one is expected to use an entry/exit door. The alarm will sound immediately if any protected zone is opened, including designated entry/exit doors. Exit delay is not possible in instant mode. To activate, enter [security code] + [7].
- Stay Mode arms the entire perimeter and an alarm will sound if any protected area or non-entry/exit if opened. Stay mode triggers the exit delay; setting the stay mode does not arm the system immediately but rather after a designated amount of time (referred to as the exit delay). To activate, enter [security code] + [3].
- Night-Stay Mode arms the entire perimeter in addition to pre-selected interior sensors. In this mode, alarms will sound if interior zones are triggered (e.g., entering area in the middle of the night), though entry/exit is possible through designated areas. To activate, enter [security code] + [3] + [3].
- Away Mode arms the entire interior and exterior. As such, this mode is not ideal for those with pets/children roaming in and out of interior zones. Away mode triggers the exit delay; setting the away mode does not arm the system immediately but rather after a designated amount of time (referred to as the exit delay). You may reenter through the designated entry/exit door without causing an alarm, but you must disarm the system within the entry delay period. To activate, enter [security code] + [2].
- Maximum Mode arms the entire interior and exterior in a manner similar to Away Mode; however, the entry delay will be turned off with this mode.
Disarming
PLEASE NOTE: If your alarm is sounding upon return, DO NOT ENTER! CALL THE POLICE from a safe location. If you return and find that the main sounder has shut itself off but the touchpad is beeping rapidly, TAKE CAUTION! Your alarm was activated while you were out.
Your [security code] + [OFF] is used to disarm the system, to silence the alarm and trouble sounds, and to clear any alarm memories. The touchpad will emit a single tone to confirm that the system has been disarmed and/or silenced.
To clear the memory of an alarm, enter [security code] + [OFF] first, then enter [security code] + [OFF] again to clear.
Bypassing Protection Zones
Zones (also called partitions) are areas that can be bypassed when arming the system. This could be ideal for those who want to arm all but one door/window.
Bypassing zones allows you to arm your system with one or more zones intentionally unprotected. The system must be disarmed before arming. Fire zones cannot be bypassed.
- Enter [security number] + [6] + two digit zone number (e.g., 06, 10, etc.).
- Once all bypassed zones are displayed on the touchpad, continue to arm the system as usual.
Door Chime (Entry/Exit Beeps)
To turn the door chime function on or off, press and hold the [CHIME] key for 2 seconds or press [*][9].
Panic Alarms
Panic Alarms
Your system may have been programmed to use special keys to manually active emergency (panic) functions. To active a panic function, press and hold down the designated lettered key for at least 2 seconds or press both keys of the designated key pair at the same time.
| Function | Signal to Customer Care | Sound Activated |
| Silent Alarm | Silent alarm | No audible alarm to indicate silent alarm has been activated but message sent to Customer Care |
| Audible Alarm | Audible alarm | A loud, steady alarm on touchpad and any sounders |
| Personal Alarm | Emergency alarm | Steady alarm at touchpad |
| Fire Alarm | Fire alarm | Pulsing sound at external bells and sirens |
Trouble Conditions
Trouble conditions are indicated by the word CHECK and continual beeping from the touchpad. Any key will silence the beeping. A display of CHECK + zone no. may indicate that a problem requires your attention. Check the specified zone area, close any open doors or windows and enter your security code and press [OFF]. If your system includes wireless sensors, the CHECK condition may be caused by some change in the environment of the protected area.
To silence trouble beeps, press any key or enter your security code and press [OFF].
For a complete list of Trouble Conditions, please refer to the Safewatch and Ademco Systems Troubleshooting page.
User Access Codes
User Access Codes/Security Codes
Your system allows for up to 47 different security codes for use by other users, however only the Master User or the Partition Programmer can assign user codes to users. User codes can be used interchangeably while performing functions, e.g., a system can be armed with one user’s code and disarmed by another’s, with the exception of the guest user code.
Programming User Codes and Authority Levels
- Assign an authority level to a user:
- Master: This user can perform all system functions and assign codes in both partitions. They can change their own code using: [Master code] + [8] + [02] + [new code] + [new code] again.
- Standard User: This user can perform security functions in assigned partition only.
- Arm Only: This user can only arm the system, cannot disarm or do other functions.
- Guest: This code is typically assigned to a babysitter or a cleaner, a guest can arm the system in the assigned partitions, but cannot disarm the system unless the system was armed with this code.
- Duress: Intended for use when forced to disarm or arm the system under threat. When used, the system will act normally, but will silently notify the Customer Care Center of your situation, if that service has been provided.
- Partition Programmer: This user can do everything a standard user can do, plus assign user codes to users in their partition.
- Assign other attributes as necessary.
User Code Attributes
| Code/Level | Command String | Notes |
| Add A User (The touchpad will beep once to confirm) | Mast/Prog code + [8] + user no. + new user’s code | User 01 = installer; User 02 = master; User 03 = partition 1 programmer; User 33 = partition 2 programmer |
| Delete User Code | Mast/Prog code + [8] + [user no.] + [#] [0] | The user code and all attributes programmed for this user number (except for the assigned partition), including any associated RF keys, are erased from the system. |
| Authority Level | Mast/Prog code + [8] + [user no.] + [#][1] + authority level | 0 = standard user; 1 = arm only; 2 = guest; 3 = duress; 4= partition programmer |
| Access Group | Mast/Prog code + [8] + [user no.] + [#][2] + group (1-8) | You can assign users to a group and then set an access schedule that defines the times this group can operate the system. The system will ignore these users outside of the scheduled times. |
| User’s Partition (Partition 1 = users 03-32; Partition 2 = users 33-49) | Master Code [8] + [user no.] + [#][3]+ partitions + [#] (to end) | Use this command to assign the partitions a specific user can access. Enter the numbers sequentially, then end the entry with [#]. 0 = clears partition 1 and partition 2. Assignments 1 = partition 1; 2 = partition 2; 3 = common partitions |
| RF User Number | Mast/Prog code + [8] + [user no.] + [#][4] + zone number | Use this command to assign a wireless button device (keyfob) to this user. For the zone number, enter the number assigned to a button on the keyfob that will be used for arming/disarming by this user. |
| Pager On/Off | Mast/Prog code + [8] + [user no.] + [#][5] + [0] or [1] | Program a user to receive a message to their pager whenever this code is used to arm/disarm. 1 = allow paging; 0= no paging for this user. |
System Testing
Testing Your System
Testing allows for each protection point to be checked for proper operation. While the touchpad will beep every 40 seconds during TEST mode, no alarm messages will be sent to the Customer Care Center. We recommend testing the system once a month. To Test the System:
- Disarm the system and close all protected areas. The READY light will appear.
- Enter your [security code] + [5] then [0] (walk).
- The external sounder should sound for 1 second.
- Go through each fault zone individually. Open each door/window and listen for three beeps from the touchpad. The zone number or description should appear on the display and clear when the door/window is closed.
- Go through each interior zone individually. Walk in front of any interior motion detectors and listen for three beeps from the touchpad. The interior zone or description should appear on the display and clear when you exit the protected area. Wireless motion detectors require a 3 minute delay between activations.
- Test all smoke detectors and follow the manufacturer’s instructions. The detector identification should appear on the display.
- When all protection points have been checked and are intact (e.g., closed), there should be no zone identification number(s) displayed on the touchpad.
- Before exiting test mode, check that there are no zone identification numbers displayed on the touchpad and that all required sounds were activated and then silenced. If any confirming sounds or zone identifications were not activated at the correct time, call for service immediately. Exit test mode by entering [security code] + [1]. Test mode will automatically shut off after 4 hours if not manually turned off.
To learn more about testing your system, please visit System Testing.
Other System Information
For a more detailed description of these features, please refer to the manufacturer’s complete manual.
Time & Date Programming
To View Current Date and Time
Enter [security code] + [#] + [6] + [3]. The time/date will remain for about 30 seconds.
To Set Date and Time
Enter [security code] + [#] + [6] + [3]. When the time/date are displayed, press [*]. Enter the 2-digit hour setting. Press [*]. Enter the 2-minute setting. Press [1] for PM or [2] for AM. Enter the last two digits of the current year. Enter the 2-digit month setting. Enter the 2-digit day setting. When the cursor is at the last digit, press [*] or wait 10 seconds to exit.
Paging Features
Your system may be set up to automatically send alert messages to a pager when certain conditions occur in your system. An installer can program your system to send a message about arming, disarming, alarms, and trouble conditions. You can also program the system to send an automatic message in the event that someone has not arrived home (no disarmament) within a defined period of time.
The pager display format is AAAAAAAAAAAAAAAA – BBB – CCCC
- A represents an optional 16 digit character string that can represent account numbers, PIN numbers, or any other identifying data.
- B represents the three digit code of the event that has occurred.
- C represents the four digit code of a user or zone number.
The three digit event codes (BBBB) that can be displayed are 911 (alarm), 811 (trouble), 101 (system disarmed), and 102 (system disarmed).
For example: 911-0004 reports an alarm (911) caused by fault zone 4 (0004) and 102-0005 reports disarming system (102) by user 5 (0005). The optional 16 digit number is not included in these examples.
Single Button Paging and Latch Key Paging can be programmed by your installer. Single Button Paging allows for a single button to be pre-programmed for a certain event. For example, you can program your PAGER KEY to send a message 101-0004 to pager number 1 when the PAGER KEY is held for two seconds. A working parent might be interested in Latch Key Paging, which will alert a parent, via their pager and a secret code, if their child did not disarm the system at the scheduled time.
Scheduling
To Create a Schedule:
- Enter the [Master code] + [#] + [6][4]
- Enter 2-digit schedule number (01-16) and press [*] to continue.
- Enter the desired 2-digit event number:
- 00 = clear scheduled event
- 01 = turn a programmed output on or off
- 02 = grant a user access to schedules for one or more users
- 03 = send a latchkey report to a pager if the system is not disarmed by a specified time; the message sent will be 777-7777
- 04 = automatically arm the system in stay mode at a specified time (pager report also sent)
- 05 = automatically arm the system in away mode at a specified time (pager report also sent)
- 06 = automatically disarm the system at a specified time (pager report also sent)
- 07 = display the word REMINDER at a specified time
- Press [*] to continue.
- For events 03-07:
- Enter the partition number to be armed or disarmed, then press [*] to continue:
- 0 = arm all 1 = partition 1 2 = partition 2 3 = arm common area
- Enter the event’s start time and the day(s) of the week:
- Position the cursor under the desired days and use the [*] key to move forward.
- Press 1 to select the day.
- Press [*] to continue.
- Enter the event’s start time.
- Enter the desired repeat option:
- 0 = no repeat
- 1 = repeat schedule weekly
- 2 = repeat schedule biweekly
- 3 = repeat schedule every third week
- 4 = repeat schedule every fourth week
Note: To make a schedule that happens every day, select all days with repeat option 1. To make a schedule that runs for one week then stops, select every day with repeat 0.
- Select the randomize option, if desired (these times will vary within 60 minutes of the hour):
Event Logging
The system records up to 100 events in a history log that can be viewed by the Master User. Please see the manufacturer’s complete manual for an itemized code list.
To View the Event:
- Enter the [master code] + [#] + [6] + [0]
- The system will display the most recent event as follows:
- Event number, type of event (by code), zone/user number, partition (where the event occurred), time, and date of event.
- Press [*] to display previous events, press to display future events.
- To exit the Event Log, press any key other than [*] or [#].
Single Button Arming and Step Arming
Single Button Arming
Your system may be programmed for Single Button Arming, which allows for activating your alarm by pressing a single function key only. You are not required to enter your user code upon arming, however the system will require your code to disarm. In order to activate your single button arming, press and hold the designated function key for two sections until the armed indicator is displayed. Please see the manufacturer’s manual for a detailed explanation of this feature.
Single Button “Step” Arming
Your system may be programmed for Single Button “Step” Arming, which is similar to Single Button Arming, however the designated function key can arm the system in any of three modes; Stay, Night-Stay, and Armed-Away.
Quick Bypass
Your system may be programmed for quick bypass. This allows for bypassing several protected zones without having to enter the zone numbers individually. This feature is useful if, for example, you routinely leave certain windows open when arming at night.
To active the Quick Bypass, enter [security code] + [6] + [#]. Within a few moments, all open zones will be displayed and automatically bypassed. Make sure that only those zones that you wish to leave unprotected are bypassed and that you have not accidentally left any zones unprotected. Now you can arm your system as usual.
Additional Features
Using Device CommandsYour system may be programmed for this function. Please see the manufacturer’s manual for a detailed explanation of this feature.
Accessing Other Partitions and Multi-Partition ArmingFor information about accessing other partitions, please see the user manual for a detailed explanation of this feature.