

Accessing the Thermostat Screen
Tap the Navigation (hamburger) menu icon in the left corner of the header to display the main menu, then tap THERMOSTATS.
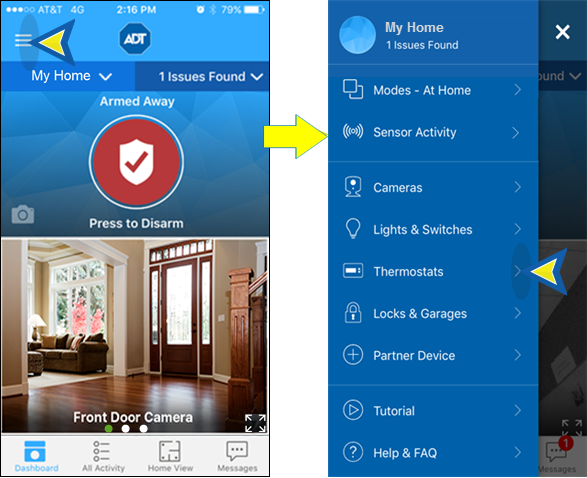
The Thermostat screen displays the first installed thermostat at your site and its current state. Swipe left to display other installed thermostats.
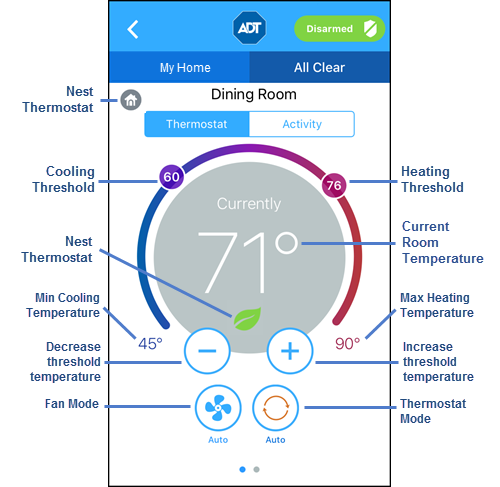
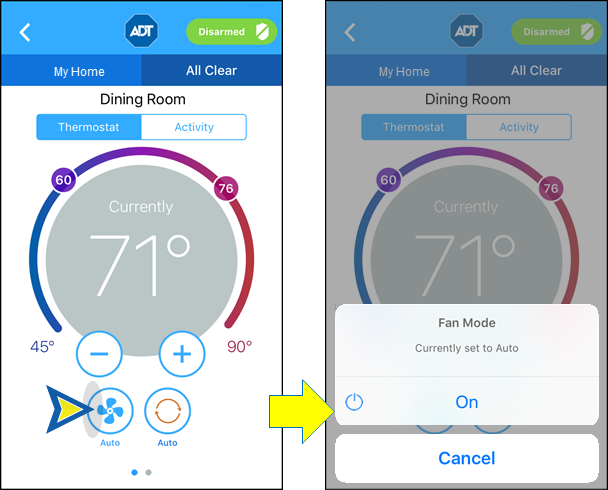
The Thermostats screen displays the current temperature at its location. The circled numbers represent the target temperature for heating and cooling. When in Automatic Thermostat mode, both the heating and cooling targets will appear; when in Heating or Cooling mode, only the heating or cooling target will appear.
The currently-selected Fan and Thermostat modes appear below the temperature display. The Fan mode indicates whether the fan is on, off or in auto mode. Thermostat mode indicates whether the thermostat is controlling heating, cooling, both (Auto), or is turned off.
Changing Settings
Mode Settings
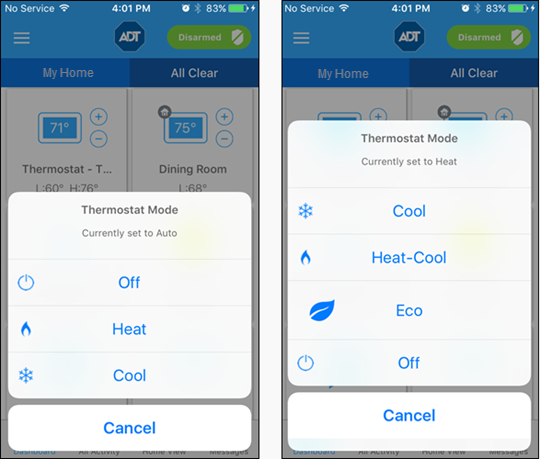
The Heating and Cooling threshold settings appear based on the mode selected. You can control the thermostat's Mode through the Pulse mobile app.
|
To change the Mode:
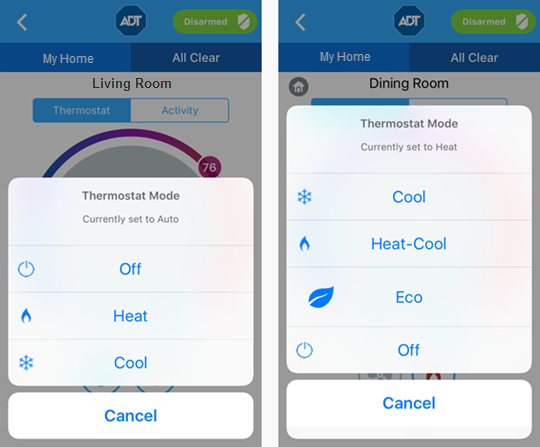
- Tap the Mode icon.
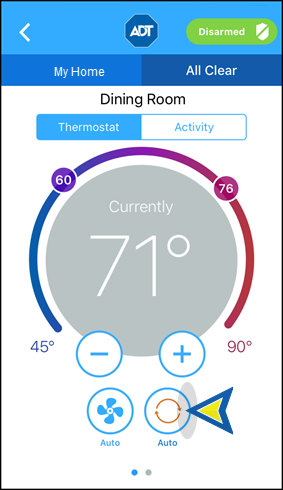
- The current mode is listed at the top of the selection menu. Tap the desired mode to select, or tap CANCEL to return to the Thermostat screen without changes. Note: Eco mode is only available on Nest thermostats.
Fan Settings
The settings for Fan work the same way. The currently selected Fan mode appears below the temperature display. The Fan mode can be either “On” to keep the fan always on, or “Auto” to have the fan come on automatically only when heating or cooling is active.
To change the Fan mode:
- Tap the Fan mode button to view the list of Fan modes
- Tap the desired setting or tap CANCEL to return to the Thermostat screen without changes.
Target Temperatures
The target temperatures for heating and cooling can be changed in two ways:
Note: When in Auto mode, both the Heating and Cooling target temperatures will be displayed and can be changed separately. In Heating or Cooling mode, only one temperature icon will display.
Note: When in Auto mode, both the Heating and Cooling target temperatures will be adjusted by the same amount.
|

Using the Dashboard
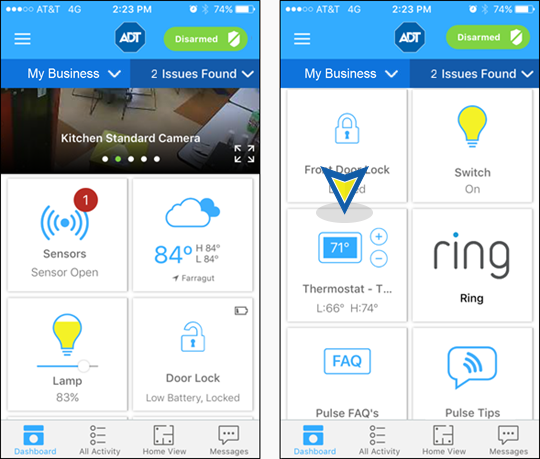
Thermostats can also be controlled from the Dashboard.
Accessing the Thermostat Control
Using the Dashboard
- Access the Pulse Dashboard.

- Scroll down the Dashboard to locate the Thermostat control tile(s).
Changing Settings
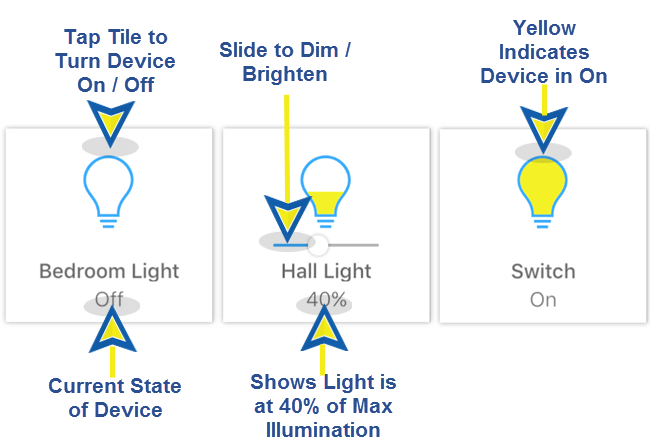
Each thermostat at the location is displayed on a separate control tile. The control provides information on the current state of the thermostat as well as controls for changing settings.
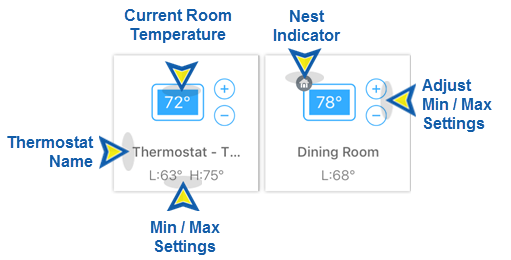
|
Changing Settings
To turn the device On or Off, tap the tile. The current state will be shown beneath the device name on the tile. Also, the icon color will change accordingly – a Clear bulb indicates the device is Off; a Yellow bulb indicates the device in On.
When a dimmer switch is off, slide the dimmer to the right to turn on the light at the selected brightness. The amount of yellow color in the icon will correspond to the percentage of illumination selected. When you turn off a light with a dimmer, the brightness level goes all the way to the left. When you turn that light on again, the brightness level returns to its previous level.
Latest Activity
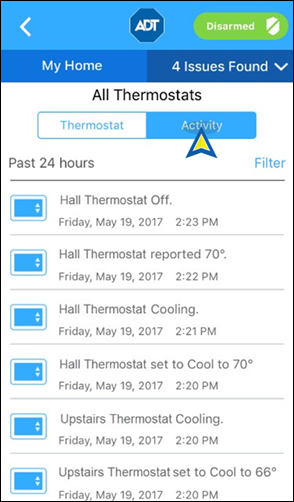
To view a list of all thermostat activity, tap Activity at the top of the Thermostat screen. This displays a time-stamped log of all thermostat activity that has occurred within the designated time period; the default is the past 24 hours.
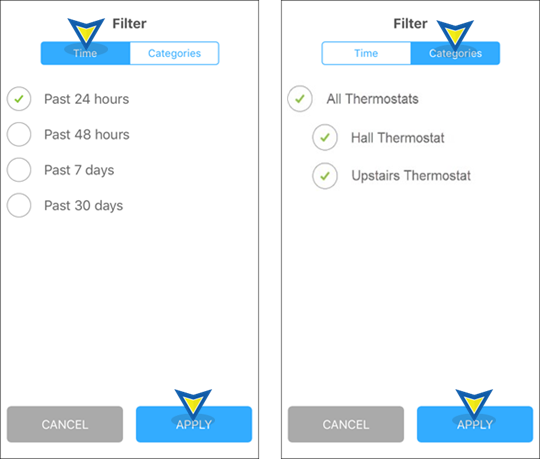
You can filter by time or by a specific sensor. To select, tap the circle by the desired item; a green check indicates that it has been selected. Tap APPLY to display the selection, or CANCEL to cancel.
|
Related Topics
Adding a Pulse Device
Here you will find on how to add a Pulse device, including a thermostat, to your Pulse system
Pulse How-to Videos
Here you will find helpful videos on adding a Pulse device and Troubleshooting a Z-Wave device, such as a thermostat
Pulse Mobile App – Basics
Here you will learn about the mobile app, including locating and using the Dashboard tiles and Home View